About CICADA
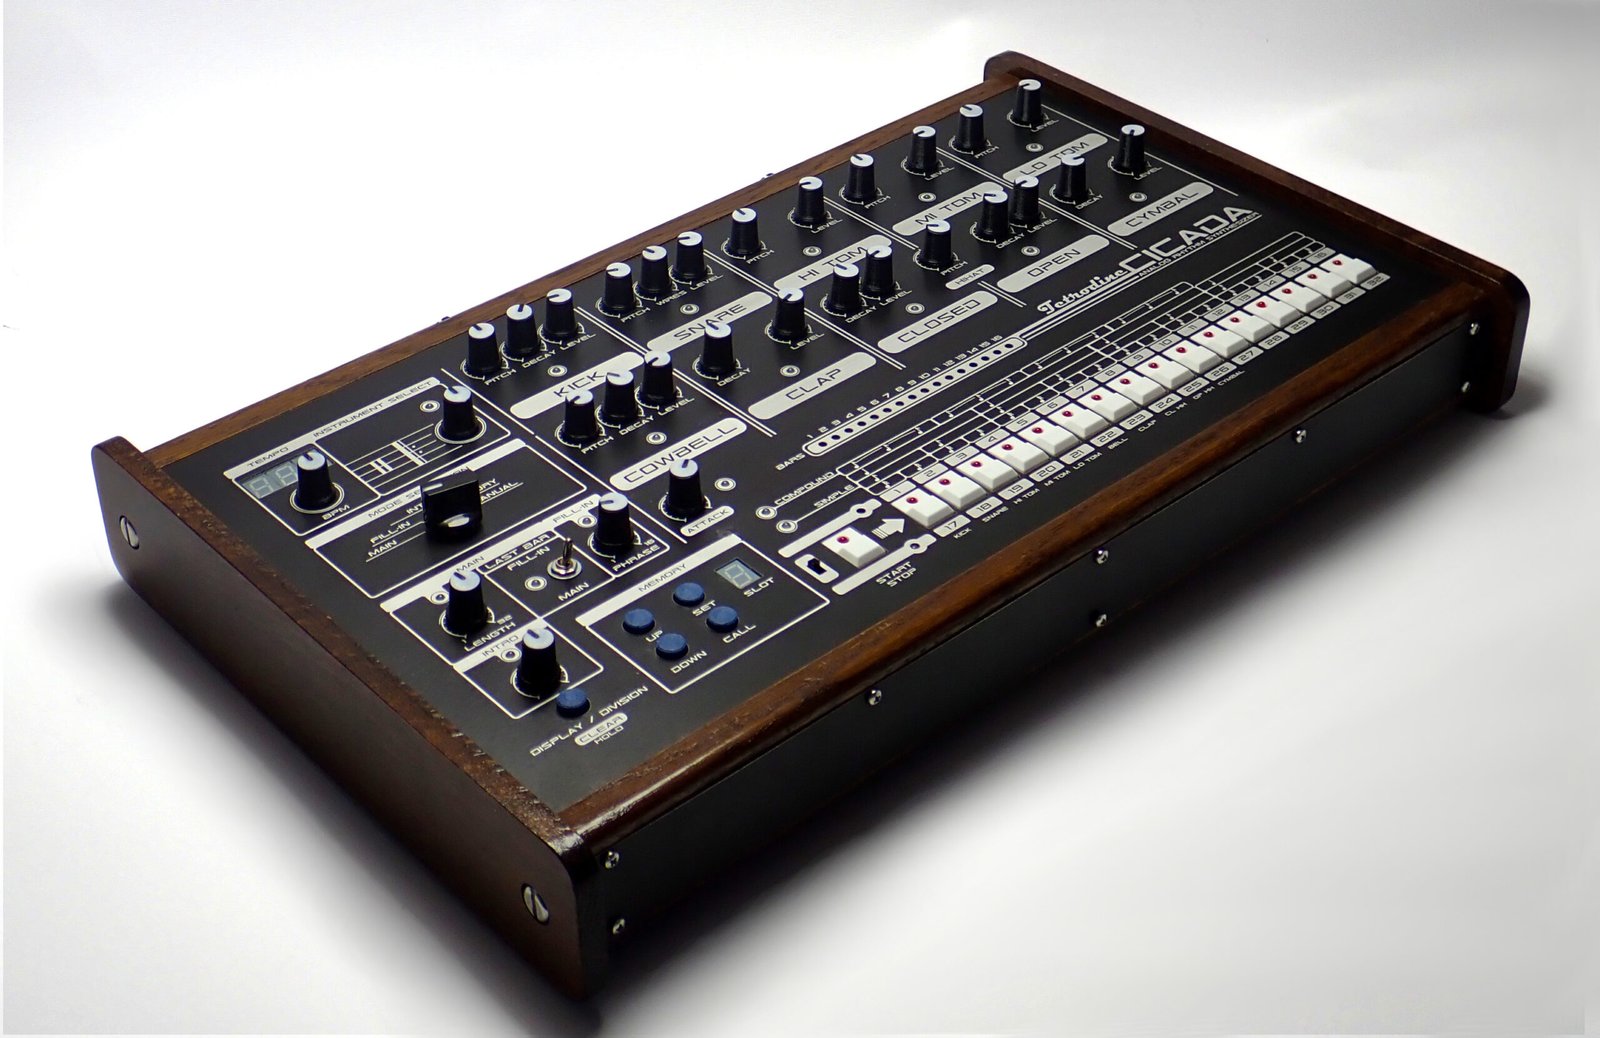
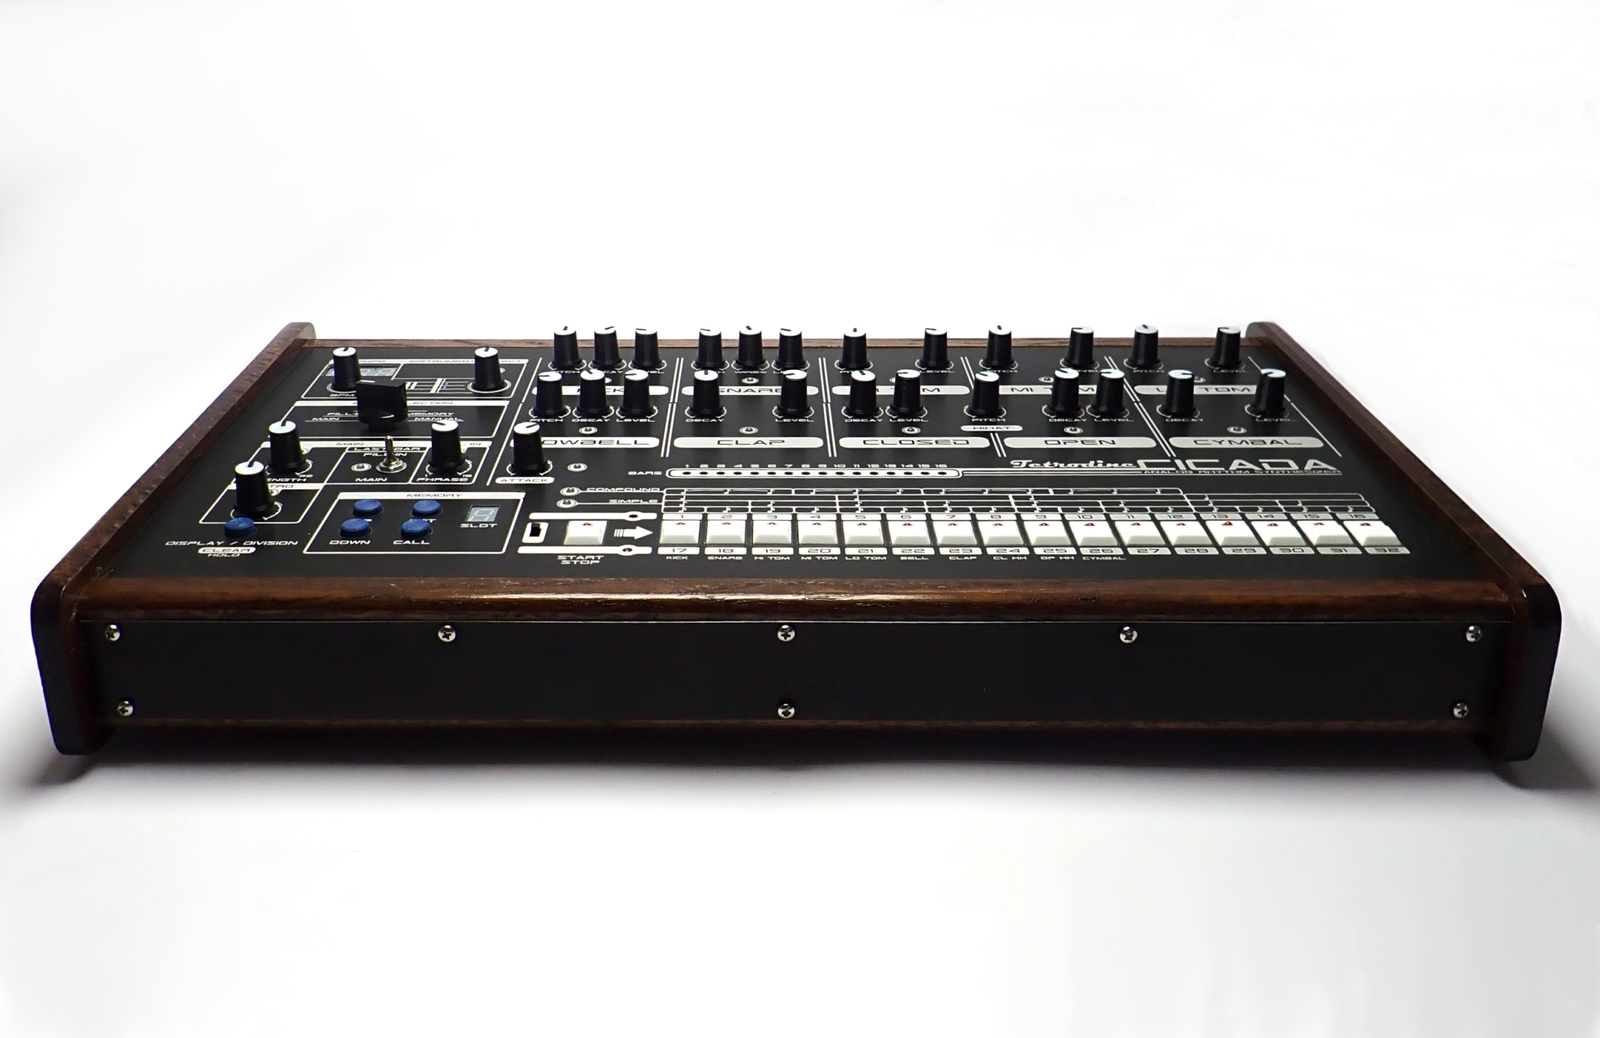
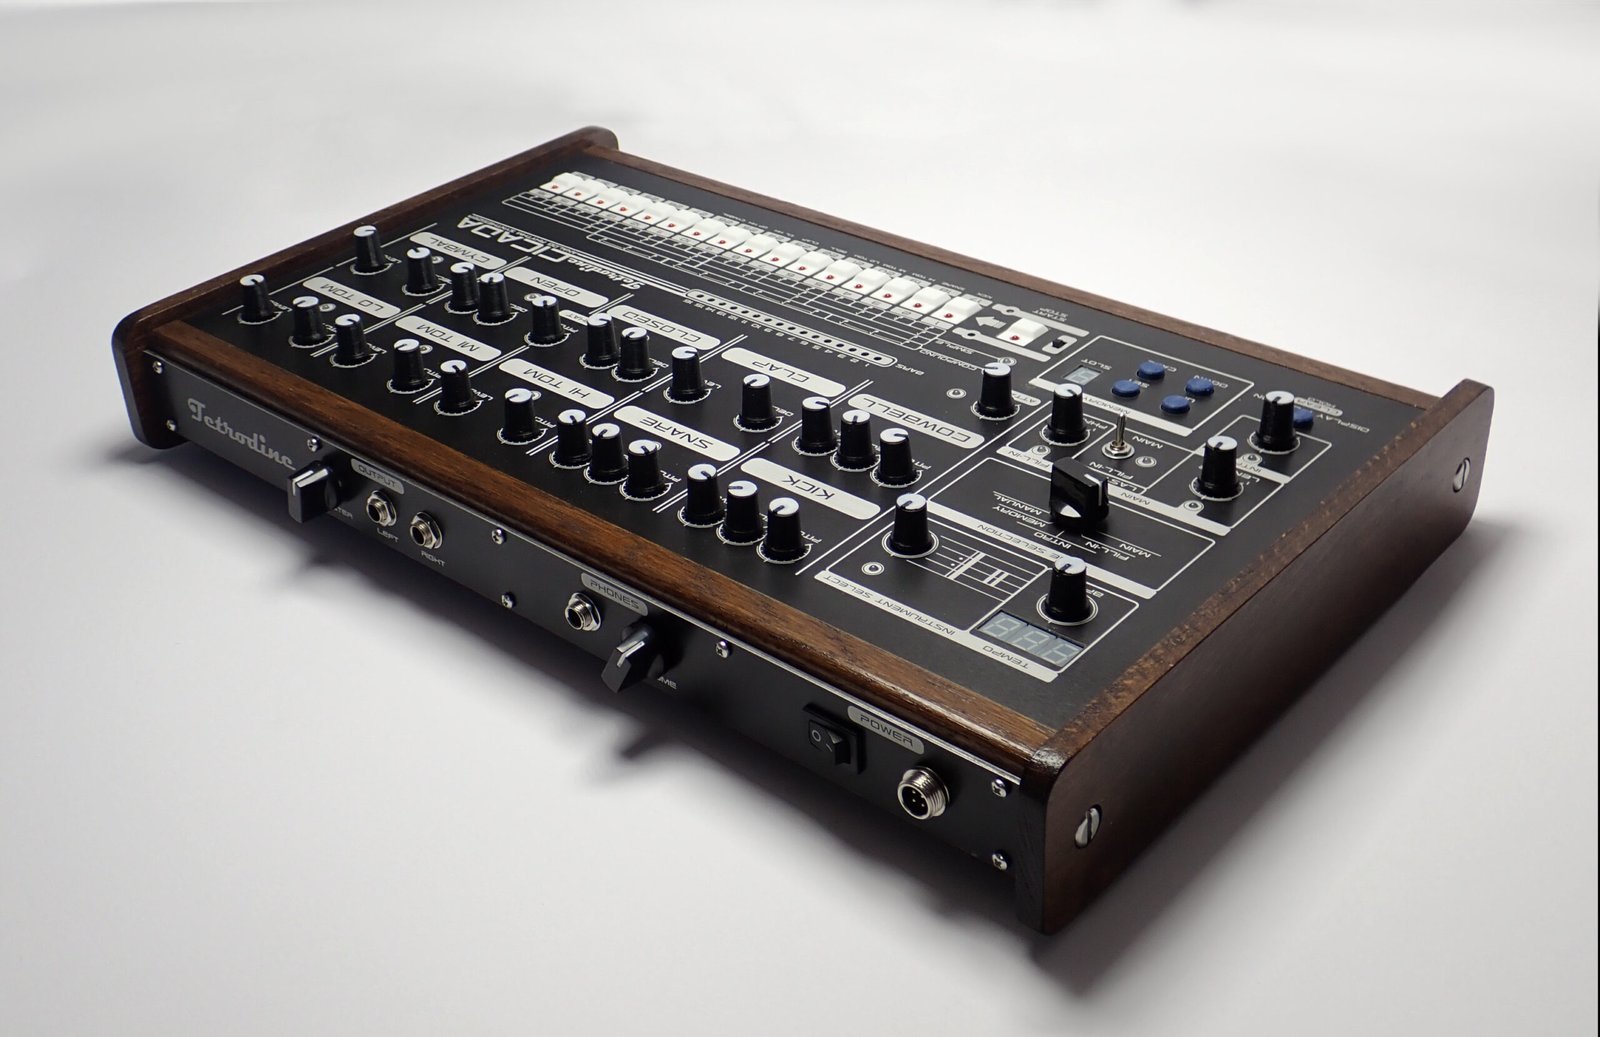
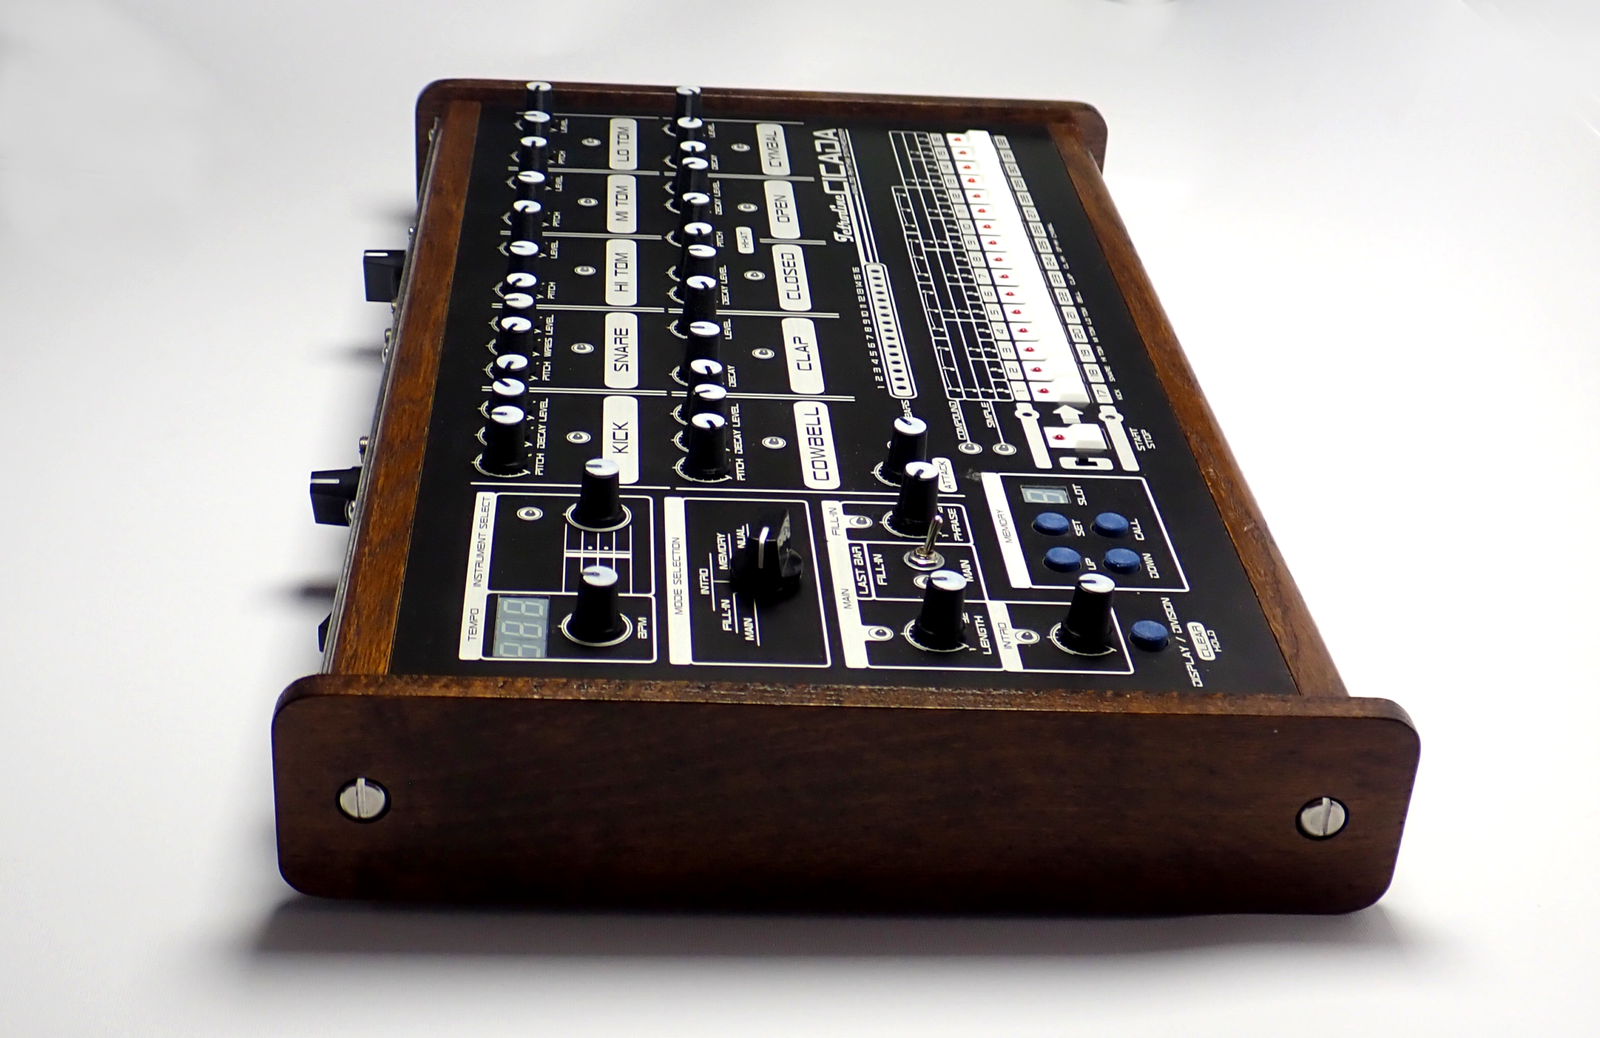
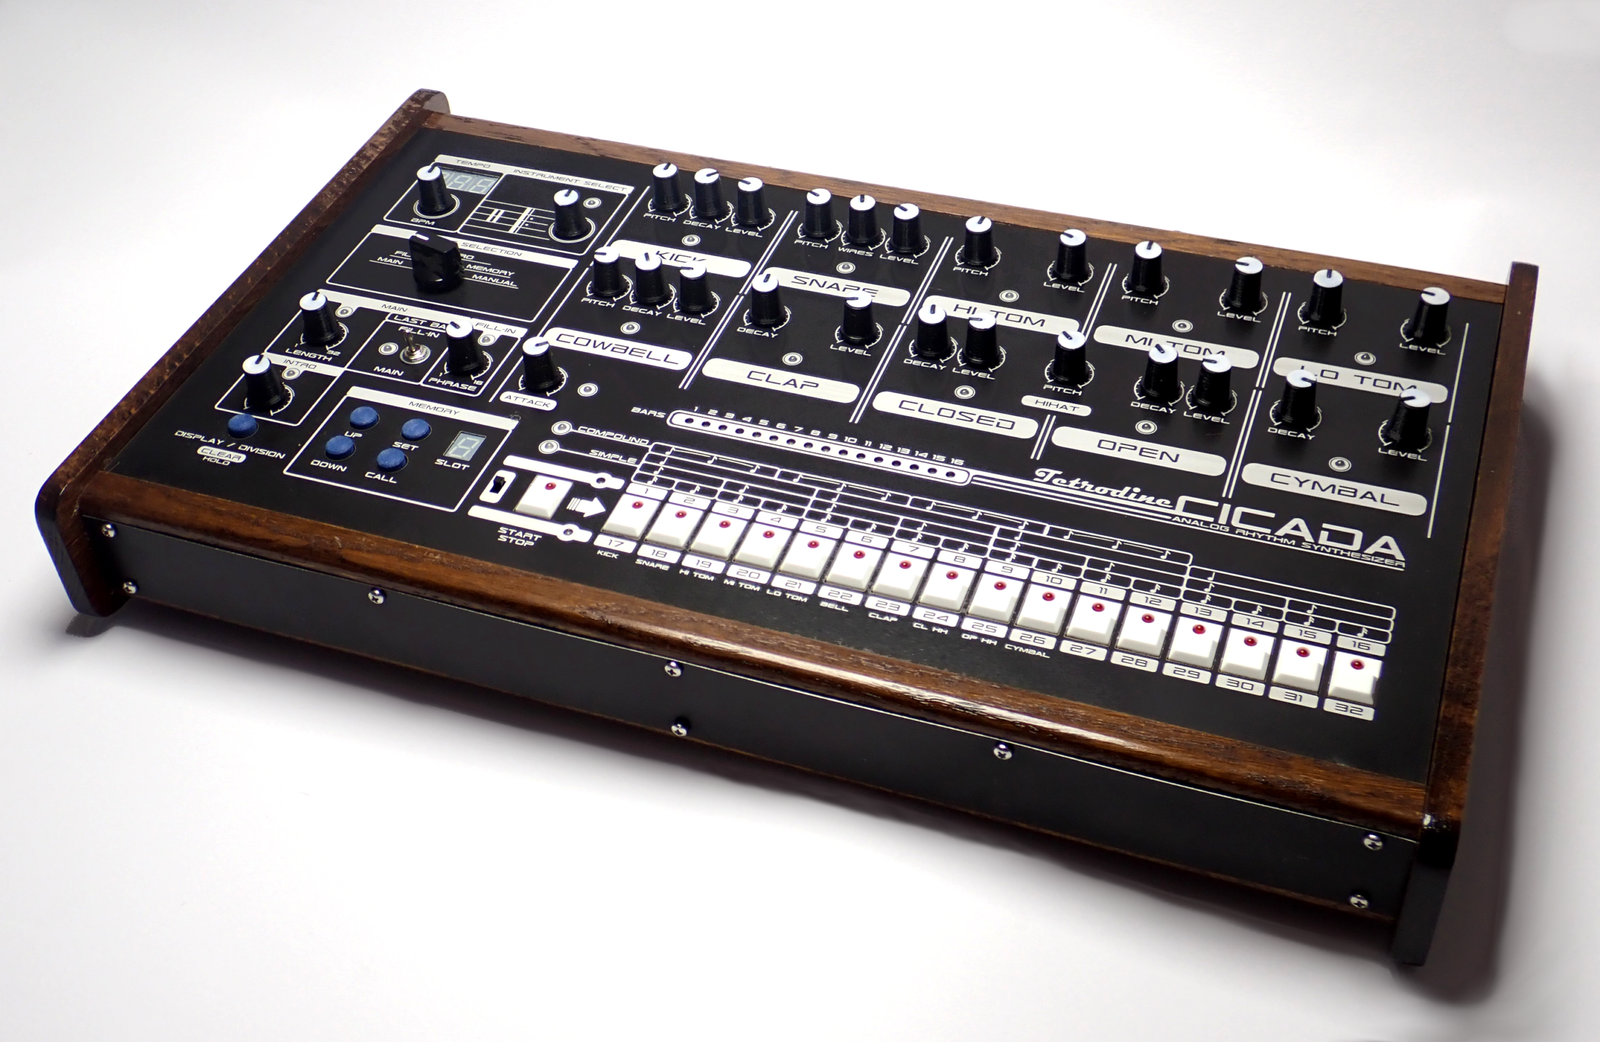
Tetrodine Cicada is an analog rhythm synthesizer and sequencer built from scratch, inspired by some of the most famous machines of the 80s, such as the Roland TR-808 and TR-909.
Just like any rhythm machine, it serves as a tool for musicians that allows them to create and adjust drum or percussion beats, as well as giving them a way to build beat patterns and loop them for playback. It is a step-sequencer, meaning that a beat is composed of a series of slots that proceed in time, each triggering a specific combination of instruments. Instruments incorporated into this machine are usual pieces found in a standard drum kit, with the addition of some other percussion like claps and a cowbell, summing to a total of 10 different instruments that can be used to create a beat. The generated sound is formed by built-in analog synthesizers, each in charge of simulating its own percussive instrument. The sound qualities, or settings of each instrument, can be altered in real time by knobs on the front panel. Alongside creating a beat sequence, the machine allows the musician to adjust other features like tempo, sequence and loop length, display mode, mode of operation, overall levels, memory storage, or add intro and fill-in sequences.

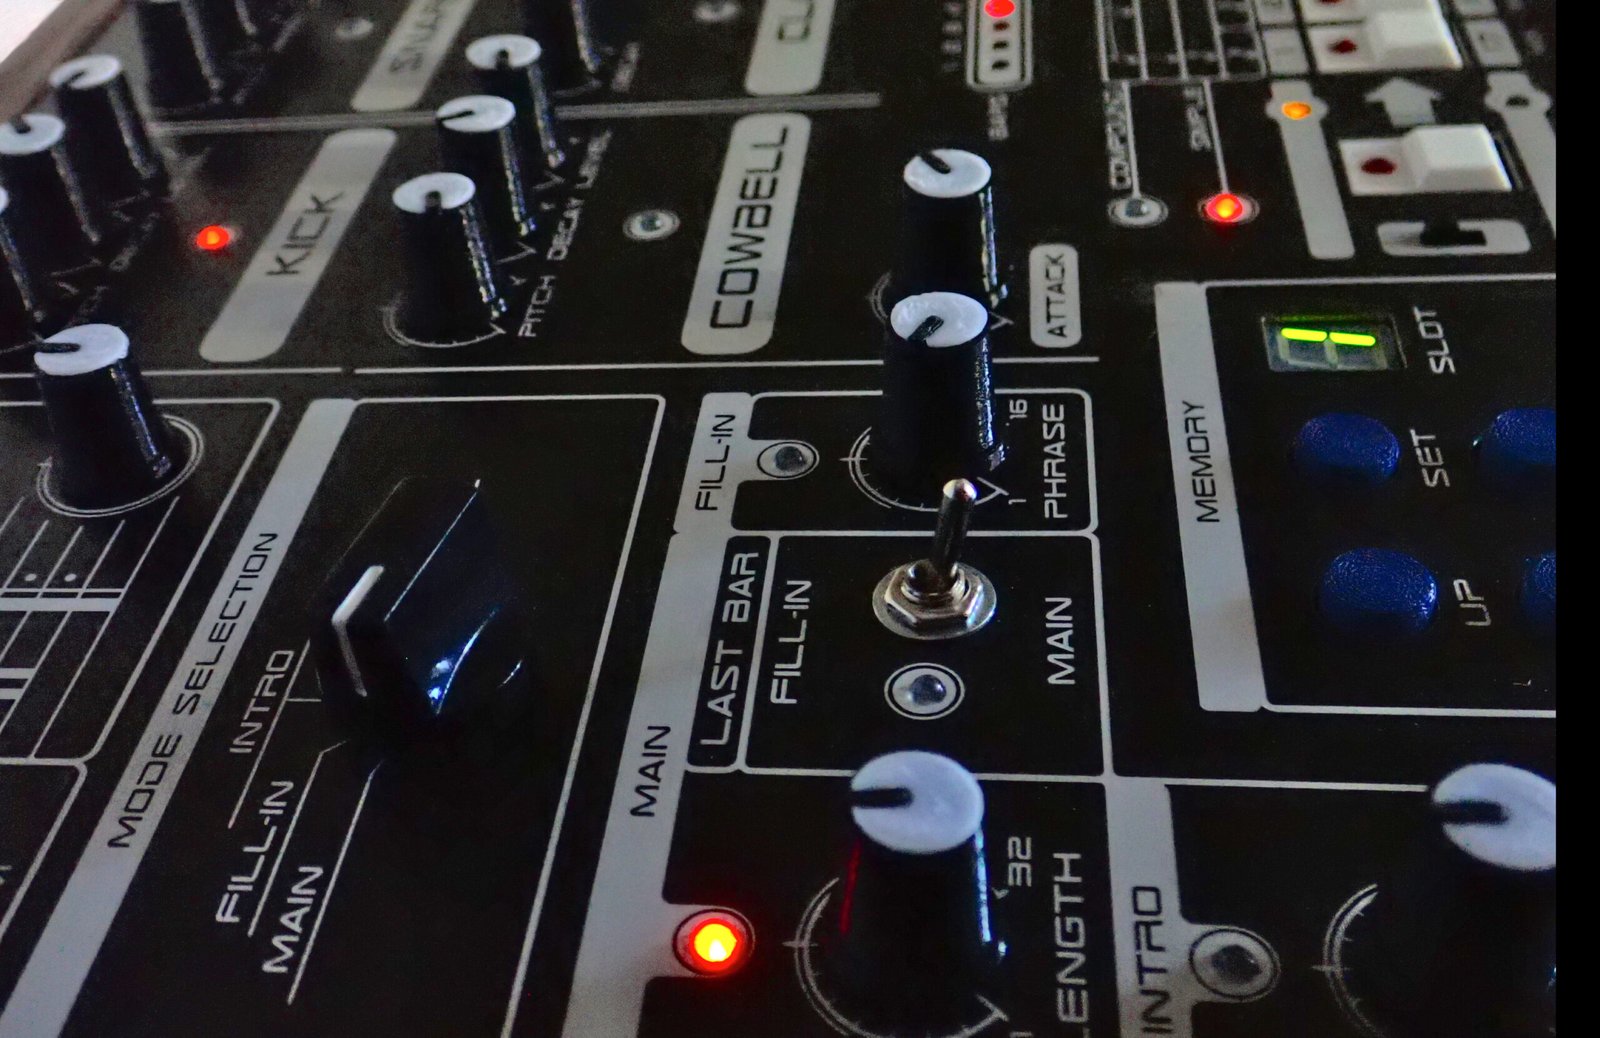


Features
- 10 adjustable analog instrument synthesizers
- Variable bar length (1 – 32 steps per bar)
- Variable phase length (1 – 16 bars per phrase)
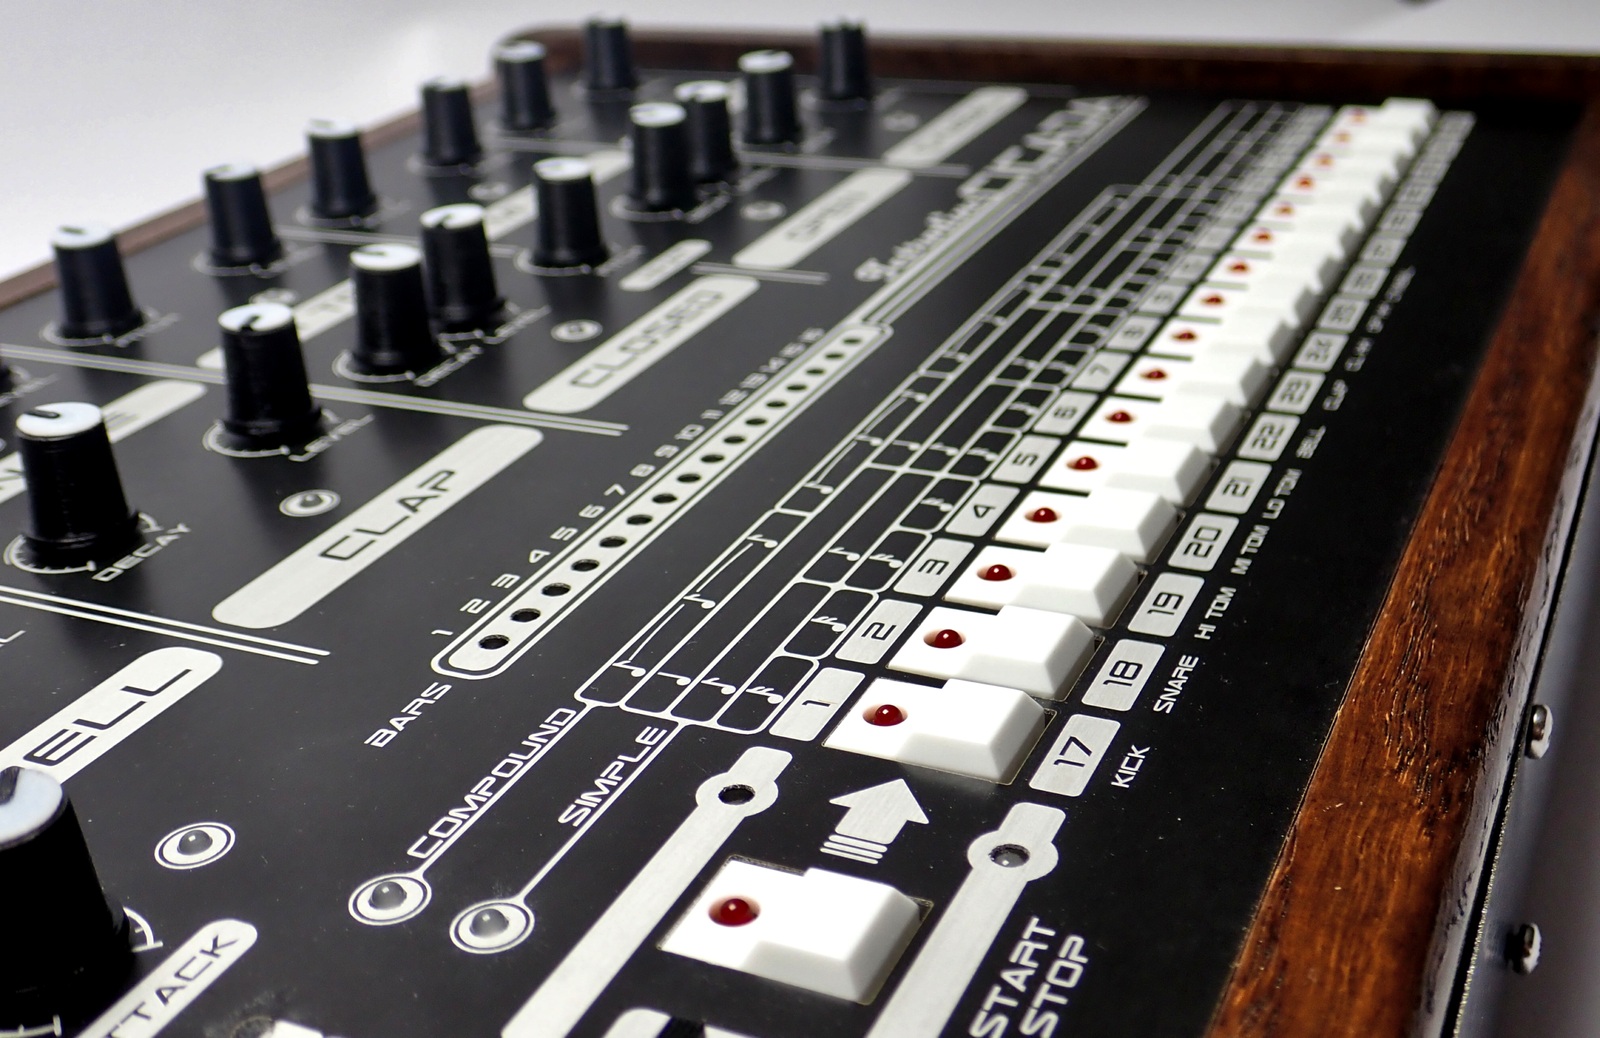
- 16-step programming keyboard
- Tempo range: 20 – 220 BPM
- Stereo-panned output
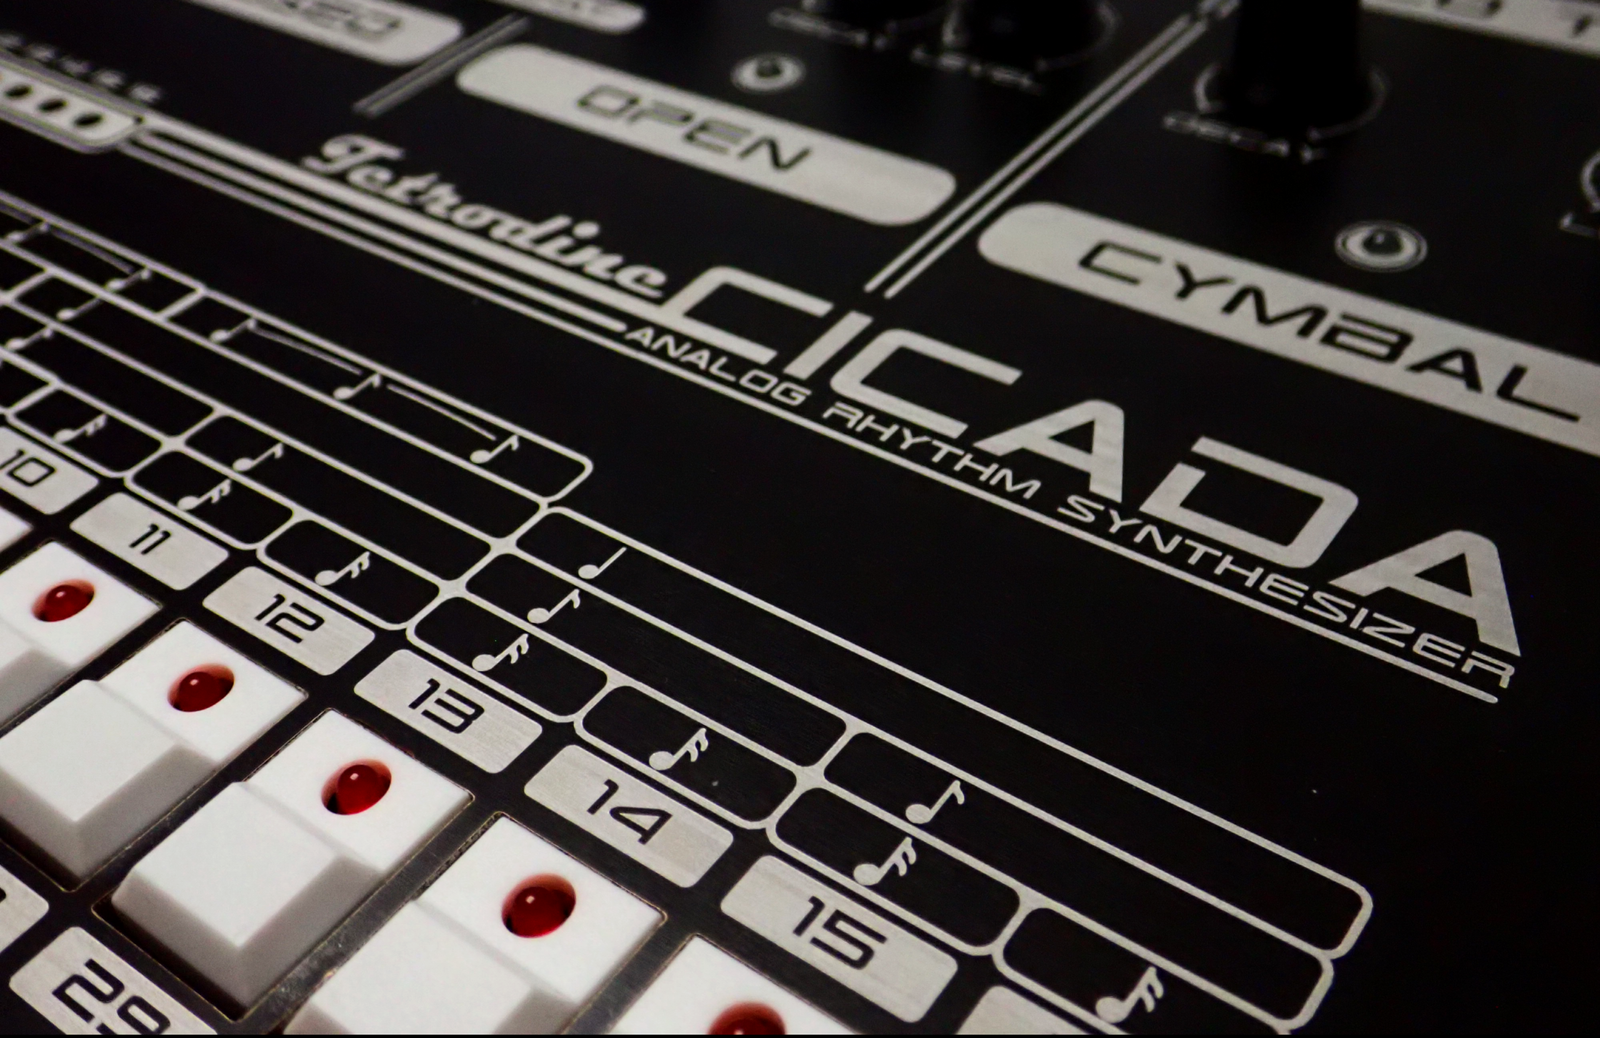
- Simple/compound rhythm
- Intro and fill-in sequences
- 10-slot memory for storing tracks
- Left and right stereo output (2 x mono ¼” jack)
- Stereo phones output (1 x stereo ¼” jack)
- Several display modes
Instruments
- Kick
- Snare
- High tom
- Middle tom
- Low tom
- Cowbell
- Claps
- Closed hi-hat
- Open hi-hat
- Cymbal
Audio samples
Here are some examples of various famous beats produced by the Cicada analog rhythm synthesizer, originally composed with some of the iconic drum machines that were used as inspiration for building this device. All of the sounds are recorded directly, with no additional post-processing.
Where did the idea come from?
This journey takes root a few years back, when I was first introduced to the magical world of percussion synths after research I’d been doing on analog audio synthesis, after being fascinated by the generation of a “gong” sound on my friend’s old PA amplifier (it is a built-in chime sound that plays before an announcement in a supermarket). It was not about the sound itself, but the way that sound was being produced, the way I hadn’t really thought about before.
Nowadays, all sound data in these types of devices is stored digitally and then reproduced when needed, but at the time this amplifier was manufactured, digital technology hadn’t yet evolved to such an extent, so this audio had to be generated analogously. Regardless of the type or field, I was always captivated by old tech. Those machines have a particular kind of beauty; they are simple on the surface, yet genuinely complex underneath, shaped by the technological limits of their time and the ingenuity of the people who built them. The craftsmanship behind them exceeds plain engineering, making it more of an art form.
Well, the realization that such a perfect bell sound can be achieved with just analog circuitry lit a spark in me to start researching, and soon enough I became an analog synth enthusiast. Even though I can call myself a musician, I was more interested in the technological aspect and history behind such instruments. That was when I came across the famous TR-808, the machine that actually inspired me to try to make my own fully functional version of this instrument. Being a long-time electronics enthusiast with several years of becoming proficient enough in building analog audio gear, I was eager enough to attempt to make this idea come true.
Principle of operation
The main purpose of this machine is to provide a way of creating beat patterns, in other words, producing drum sounds in a sequence that plays in a loop, thereby creating a track. Every sequence is composed of a number of steps, with each step triggering its own instruments. There are three types of sequences that we can incorporate in a track using this machine: main, fill-in and intro sequences.
The main sequence is the core of the track and is meant to repeat in a loop, while fill-in and intro sequences can be turned on or off depending on whether we want them in the track or not. The fill-in sequence, if turned on, is played on the last bar in a phrase to break the repetition of a main rhythm pattern. It can be used to add variation and interest to the rhythm, making it less monotonous. The intro sequence is automatically turned on if not empty, and is played once at the beginning of a track. The length of each sequence can be adjusted with dedicated knobs and controls on the control panel.
The programming is done by a 16-step programming keyboard and an instrument selector knob. Only one instrument can be programmed at a time, and after it is selected, the pattern can be edited by pushing the buttons on the keyboard, thereby switching the slots on and off. The sequence length, as well as the phrase length, is variable. Depending on a rhythm type (simple or compound), it can be adjusted to anywhere from 1 to 32 steps of sixteenth notes, or 1 to 24 steps of eighth notes, respectively. After all instruments are programmed and the playback is started, the chasing light will start indicating the current step in a sequence, while the bar indicator indicates the current bar that is playing in a phrase, as well as the overall phrase length. Settings of all the instruments can be changed in real time regardless of the mode and state of the operation, by rotating the knobs in the instrument section on the front panel. It is also possible to store a created track in a memory slot, allowing it to be recalled later after the device has been turned off.
User interface
The user interface is placed right on top, so all buttons, knobs and other elements for interacting with the machine are easily accessible, as well as organised into role groups. There are three main groups of controls:
- Programming keyboard and playback group
- Control panel
- Instrument panel

Programming keyboard and playback group
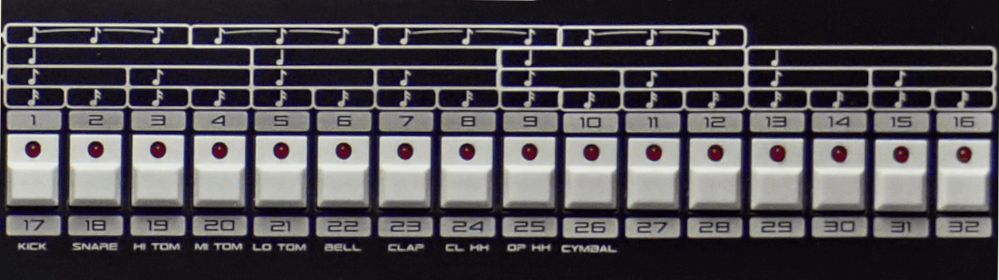
This section is placed at the bottom of the front panel and consists of:
- 16-step programming button array with LED step indicators:
- An array of buttons used to program the sequence, that is, placing instruments in the right positions in a sequence. LED indicators show the programmed pattern of the currently selected instrument, as well as the current position in a sequence when playing, in the form of chasing blinks.
- Bar LED indicator
- An array of dual-colour LEDs, wherein the position of a red colour marks the last bar in a phrase, as yellow indicates the bar that is currently playing
- Start/stop button
- A button used to run or stop the playback of the track
- Upper/lower bar section selector
- If the bar (sequence) consists of a number of steps that is larger than 16 (or 12 in compound rhythm mode), the higher slots can be accessed by using this selector. This is a simple two-position switch; position A maps the keyboard to steps 1-16 (or 1 – 12 if using compound rhythm mode), while position B maps the keyboard to steps 17-32 (or 13 – 24, again if using compound rhythm mode).
Control panel
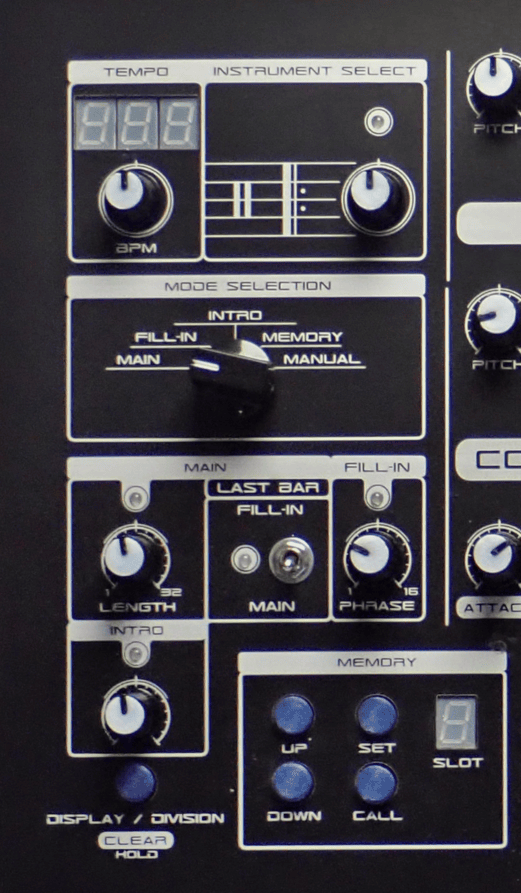
This section is placed on the left side of the machine and is separated into several smaller groups:
- Tempo section
- Adjusting the tempo can be done with a rotary knob
- Instrument selection
- The knob that cycles through all of the instruments, allowing the musician to edit or read the program of the selected instrument
- Mode selection
- A 5-way switch, each position representing a mode of operation.
- MAIN – Main sequence editing
- FILL-IN – Fill-in sequence editing
- INTRO – Intro sequence editing
- MEMORY – Used to enable the memory section for storing and recalling saved tracks
- MANUAL – The triggering of the instruments is done manually
- Bar/phrase/intro length controls
- Rotary knobs in charge of determining the length of a single bar, as well as the length of a phrase. The last bar in a phrase can be either played as a main sequence or as a fill-in sequence, depending on the position of a switch labelled „Last Bar“. The Phrase length is displayed as the position of a red light in a bar LED indicator, while bar length can be seen for a short time on the LED step indicators. Main and fill-in bars share the same length, whereas the length of an intro sequence can be adjusted with a separate knob.
- Memory section
- Organized in 10 available slots, it allows the musician to store and later recall a previously saved track. Works only under the condition that MEMORY mode is selected
- Multipurpose button
- A button is used as simple/compount rhyhm selector when the playback is not running, or as a display mode selector when the playback is running. A longer, 2s hold clears the current track
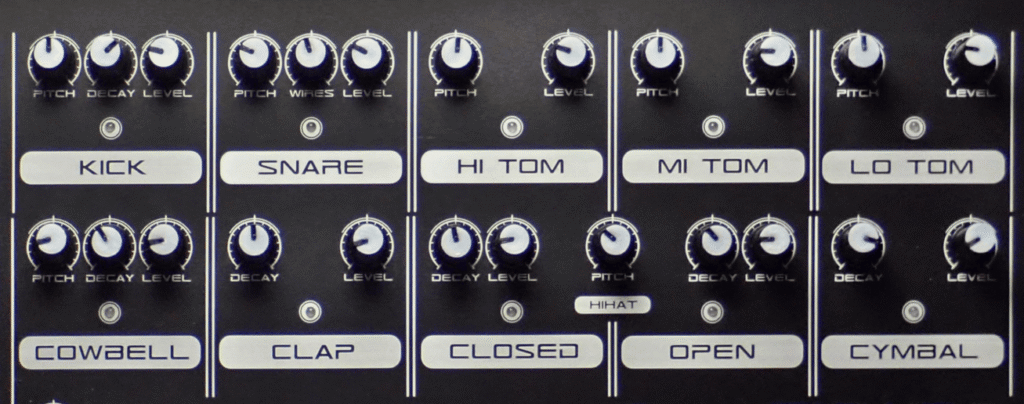
Instrument panel
This section is located on the upper side of the front panel and consists of numerous knobs for adjusting instrument settings. Every instrument has its own group of control knobs that can be adjusted in real time, regardless of the currently selected instrument, mode of operation, or whether playback is running or not.